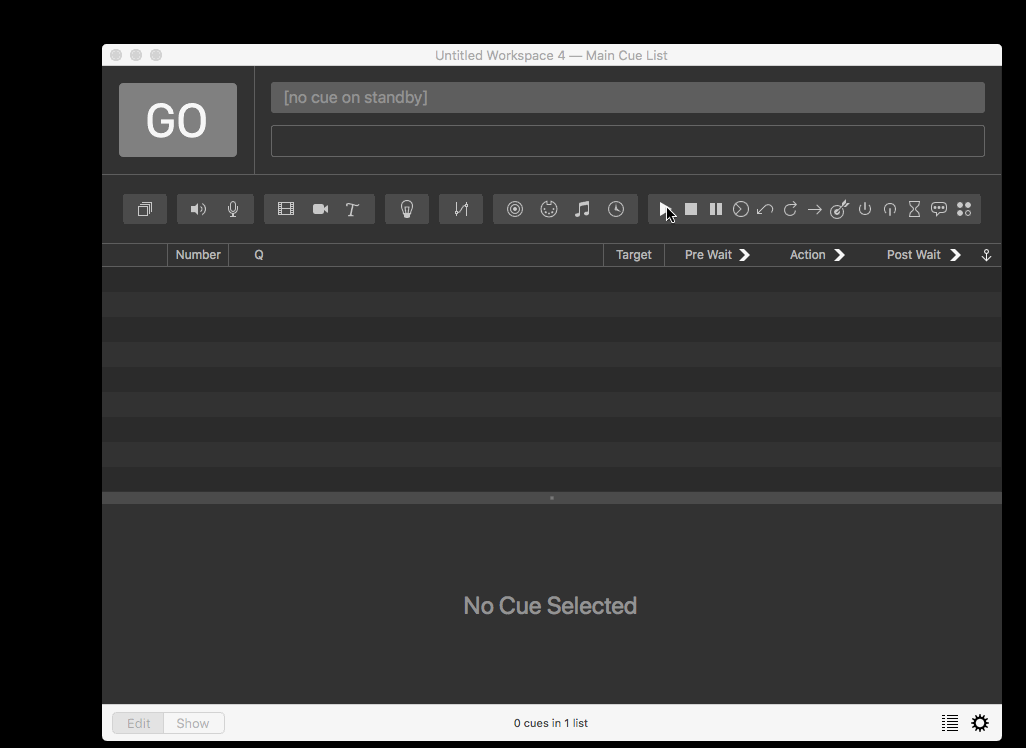
Raspberry Pi QLab playhead manual
This is the manual for the Raspberry Pi playhead project. If you are looking for the instructions to make one then you can find that post here.
Getting started
To boot the pi playhead you will require a USB A to micro USB cable. This cable connects between a USB port on the host mac (running a QLab session) and the data port on the Raspberry Pi Zero. Once the pi playhead is connected it will start the boot process automatically. Once the system has loaded you will see the message:

Followed by the version number of the software that the playhead is running. At the time of writing this guide that should be:

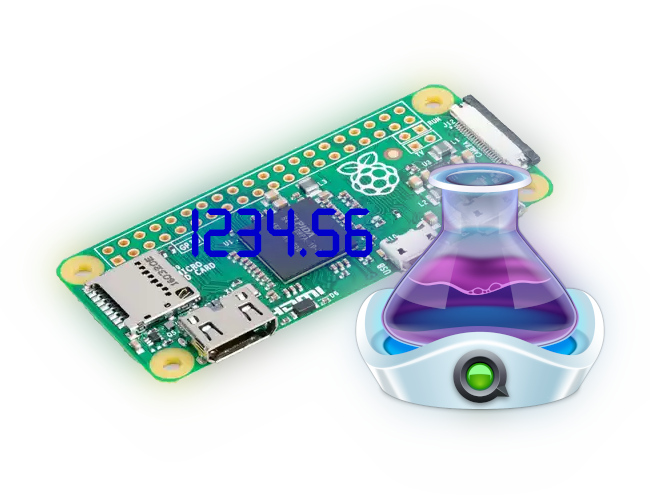
Once the playhead has successfully connected to the QLab session the it will display a six character truncated cue number of the cue that the playhead is sitting on.
Settings
To control the pi playhead you will need to add it as a network destination in QLab.
The playhead assign two IP addresses. One for the playhead itself and one for the mac. The playhead will always default to the IP address 192.168.123.1/32 and the mac to 192.168.123.2/32. The playhead also listen from messages from QLab on port 53001 as this is the default that Qlab replies to OSC messages on.
Blank screen
To turn the screen off or on send one of the following message to the playhead using a QLab network cue. Off:
/settings/blank true
(The blank setting is on and nothing is displayed on the screen)
On:
/settings/blank false
(The blank setting is off and the playhead position is displayed on the screen)
Using this setting will only turn the screen off. The pi playhead will continue to request the position of the playhead in QLab but not write the result to the screen.
Brightness
To set the brightness of the screen send the following message to the playhead using a QLab network cue:
/settings/brightness X
Where X is in the range 1 - 7. The default is: 3
Your mileage may vary with this setting. Although the screen I used responds to 7 different brightness levels but I can only see about 3 changes by eye.
Refresh rate
To set the refresh rate of the screen send the following message to the playhead using a QLab network cue:
/settings/refresh X
Where X is a time in seconds expressed as a decimal. The default is: 0.25
Use this setting wisely. For every refresh rate period the pi playhead will first send a ICMP ping message to ascertain if the mac is there and the send an OSC message requesting the position of the pi playhead. The lower the value of X the more network traffic that the pi playhead will produce.
Troubleshooting
It can take a little while for the DHCP server to establish itself on the pi playhead. This may cause your mac to resort to a self-assigned address rather than the one reserved for the mac. If this happens follow the following steps:
- Go to the mac network settings window
- Select the RNDIS network interface
- Open the advanced settings pop-up
- Click the “Renew DHCP lease” button - it may take a couple of attempts for the mac to get the IP address 192.168.123.2
- Once the mac has the correct IP address click apply in the network settings window.
Update the software version
The easy/safe way
Get a new SD card and follow the how to make guide from start to finish. If you fail to rebuild the update then you can always swap back to the old SD card.
The proper way
Updating the software version via this method is only recommended for those familiar with a Linux operating system
- Take your pi playhead and connect it to a screen and keyboard.
- Connect to a Wi-Fi network with internet access
- Run the command
sudo apt update && sudo apt upgrade -y(update the operating system on the Raspberry Pi) - Navigate to the project folder
- Run the command
git pull origin(get new updates from the online repository) - Resolve any merge conflicts (this should only happen if you have modified the original install so I’m assuming you’ll know how to do this yourself)
- Follow any instructions on the release page to fix any breaking changes
- Test that the functionality still matches what you would expect
Licence
Copyright (c) 2024 allaway.tech
Permission is hereby granted, free of charge, to any person obtaining a copy of this software and associated documentation files (the “Software”), to deal in the Software without restriction, including without limitation the rights to use, copy, modify, merge, publish, distribute, sublicense, and/or sell copies of the Software, and to permit persons to whom the Software is furnished to do so, subject to the following conditions:
The above copyright notice and this permission notice shall be included in all copies or substantial portions of the Software.
THE SOFTWARE IS PROVIDED “AS IS”, WITHOUT WARRANTY OF ANY KIND, EXPRESS OR IMPLIED, INCLUDING BUT NOT LIMITED TO THE WARRANTIES OF MERCHANTABILITY, FITNESS FOR A PARTICULAR PURPOSE AND NONINFRINGEMENT. IN NO EVENT SHALL THE AUTHORS OR COPYRIGHT HOLDERS BE LIABLE FOR ANY CLAIM, DAMAGES OR OTHER LIABILITY, WHETHER IN AN ACTION OF CONTRACT, TORT OR OTHERWISE, ARISING FROM, OUT OF OR IN CONNECTION WITH THE SOFTWARE OR THE USE OR OTHER DEALINGS IN THE SOFTWARE.